Building a Custom Counter App in React using useReducer
React, a JavaScript library is popular among developers worldwide. It was created by Facebook in 2013 and has since gained popularity amongst developers. It allows you to compose complex, and interactive user interfaces(UIs) from reusable code blocks called “components”.
This article is beginner-friendly. It offers detailed step-by-step procedures on how to create a basic counter app with React.js using the useReducer hook.
Gaining proficiency in React does not have to be challenging, but a strong foundation in JavaScript, including concepts like classes, functions, and array methods, can certainly make the learning process easier
Requirements
HTML
CSS
Basics of JavaScript.
Basics of React.js library.
What you will learn
At the end of this article, you will be able to build a custom counter app using useReducer in React.js.
Getting Started
First, you install Node.js.
Install and run your React app, on your terminal with the command below.
npm create-react-app updated-assignment
Creates React counter-app folder.
NPM is a Node Package Manager. It manages node packages for your application. The folder will be named counter-app, in which the React.js app will be installed. The folder name can be changed.
- Change the directory on your terminal line to the counter app.
PS C:\Users\HP\Documents> updated-assignment
Changes the directory to counter-app.
- Run the command below on your terminal line.
npm run start
Sets up the live app on the web browser.
After running the command on your terminal, it will set up a webpage on your local browser on port 3000.

React App on port 3000.
Create a Functional Component
In this article, you will create a functional component and name it App. A functional component is structured as -
import { React } from "react";
const App = () => {
return (
<></>
);
};
export default App;
A functional component
You will need three buttons on your counter app in the App component. An increment button(+), a Decrement button(-), and a reset button. You will also use a div tag to display the output.
Introduction to the useReducer Hook
In Redux, a reducer is a pure function that takes in the current state of an application and an action and returns a new state based on that action. Reducers are the building blocks of a Redux application and are responsible for updating the application’s state in response to actions dispatched by the application.
import React, { useReducer } from 'react';

function reducer(state, action) {
  switch (action.type) {
    case 'INCREMENT':
      return { count: state.count + 1 };
    case 'DECREMENT':
      return { count: state.count - 1 };
    default:
      return state;
  }
}

function Counter() {
  const [state, dispatch] = useReducer(reducer, { count: 0 });

  return (
    <>
      <div>Count: {state.count}</div>
      <button onClick={() => dispatch({ type: 'INCREMENT' })}>
        Increment
      </button>
      <button onClick={() => dispatch({ type: 'DECREMENT' })}>
        Decrement
      </button>
    </>
  );
}
The Counter component uses the useReducer hook to manage its state in this example. The useReducer hook takes in a reducer function and an initial state and returns an array containing the current state and a dispatch function.
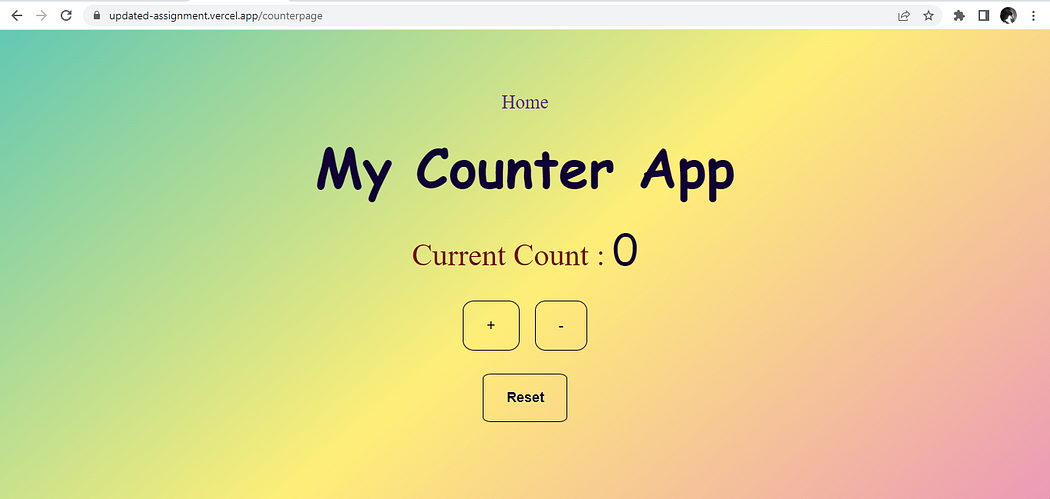
The component renders a count and two buttons to increment or decrement the count. When the buttons are clicked, the component dispatches an action to the reducer using the dispatch function. The reducer then updates the state based on the action type and returns the new state, which causes the component to re-render with the updated count. At the end, it should look like this

Conclusion
You now have a working idea of how the counter works. Have you ever wondered, how likes on social media platforms work, with the click of a button? Now you have an idea. Remember that with consistent practice, the odds are forever in your favor. Happy coding!